Docker Hands-on🔗
Note
If you are lost, docker system prune will remove dangling images and stopped containers.
0. Abstract🔗
Abstract
In this hands-on, you will discover the basics of Docker and learn to manipulate images and containers.
You should be inside the Github Codespace you created and have google cloud SDK installed in it
If not, refer to the previous tutorial and do step 2 and 3
This codespace has everything you need, including docker
If you want to do everything from your linux machine you can install docker but I don't recommend it for now
1. Manipulating docker for the 1st time🔗
Source: https://github.com/docker/labs
To get started, let's run the following in our terminal:
$ docker pull alpine
The pull command fetches the alpine image from the Docker registry and saves it in our system. You can use the docker images command to see a list of all images on your system.
$ docker images
REPOSITORY              TAG                 IMAGE ID            CREATED             VIRTUAL SIZE
alpine                 latest              c51f86c28340        4 weeks ago         1.109 MB
hello-world             latest              690ed74de00f        5 months ago        960 B
1.1 Docker Run🔗
Great! Let's now run a Docker container based on this image. To do that you are going to use the docker run command.
$ docker run alpine ls -l
total 48
drwxr-xr-x    2 root     root          4096 Mar  2 16:20 bin
drwxr-xr-x    5 root     root           360 Mar 18 09:47 dev
drwxr-xr-x   13 root     root          4096 Mar 18 09:47 etc
drwxr-xr-x    2 root     root          4096 Mar  2 16:20 home
drwxr-xr-x    5 root     root          4096 Mar  2 16:20 lib
......
......
What happened? Behind the scenes, a lot of stuff happened. When you call run,
- The Docker client contacts the Docker daemon
- The Docker daemon checks local store if the image (alpine in this case) is available locally, and if not, downloads it from Docker Hub. (Since we have issued
docker pull alpinebefore, the download step is not necessary) - The Docker daemon creates the container and then runs a command in that container.
- The Docker daemon streams the output of the command to the Docker client
When you run docker run alpine, you provided a command (ls -l), so Docker started the command specified and you saw the listing.
Let's try something more exciting.
$ docker run alpine echo "hello from alpine"
hello from alpine
echo command in our alpine container and then exited it. If you've noticed, all of that happened pretty quickly. Imagine booting up a virtual machine, running a command and then killing it. Now you know why they say containers are fast!
Try another command.
docker run alpine /bin/sh
Wait, nothing happened! Is that a bug? Well, no. These interactive shells will exit after running any scripted commands, unless they are run in an interactive terminal - so for this example to not exit, you need to docker run -it alpine /bin/sh.
You are now inside the container shell and you can try out a few commands like ls -l, uname -a and others. Exit out of the container by giving the exit command.
Ok, now it's time to see the docker ps command. The docker ps command shows you all containers that are currently running.
$ docker ps
CONTAINER ID        IMAGE               COMMAND             CREATED             STATUS              PORTS               NAMES
Since no containers are running, you see a blank line. Let's try a more useful variant: docker ps -a
$ docker ps -a
CONTAINER ID        IMAGE               COMMAND                  CREATED             STATUS                      PORTS               NAMES
36171a5da744        alpine              "/bin/sh"                5 minutes ago       Exited (0) 2 minutes ago                        fervent_newton
a6a9d46d0b2f        alpine             "echo 'hello from alp"    6 minutes ago       Exited (0) 6 minutes ago                        lonely_kilby
ff0a5c3750b9        alpine             "ls -l"                   8 minutes ago       Exited (0) 8 minutes ago                        elated_ramanujan
c317d0a9e3d2        hello-world         "/hello"                 34 seconds ago      Exited (0) 12 minutes ago                       stupefied_mcclintock
What you see above is a list of all containers that you ran. Notice that the STATUS column shows that these containers exited a few minutes ago. You're probably wondering if there is a way to run more than just one command in a container. Let's try that now:
$ docker run -it alpine /bin/sh
/ # ls
bin      dev      etc      home     lib      linuxrc  media    mnt      proc     root     run      sbin     sys      tmp      usr      var
/ # uname -a
Linux 97916e8cb5dc 4.4.27-moby #1 SMP Wed Oct 26 14:01:48 UTC 2016 x86_64 Linux
run command with the -it flags attaches us to an interactive tty in the container. Now you can run as many commands in the container as you want. Take some time to run your favorite commands.
That concludes a whirlwind tour of the docker run command which would most likely be the command you'll use most often. It makes sense to spend some time getting comfortable with it. To find out more about run, use docker run --help to see a list of all flags it supports. As you proceed further, we'll see a few more variants of docker run.
1.2 Terminology🔗
In the last section, you saw a lot of Docker-specific jargon which might be confusing to some. So before you go further, let's clarify some terminology that is used frequently in the Docker ecosystem.
- Images - The file system and configuration of our application which are used to create containers. To find out more about a Docker image, run
docker inspect alpine. In the demo above, you used thedocker pullcommand to download the alpine image. When you executed the commanddocker run hello-world, it also did adocker pullbehind the scenes to download the hello-world image. - Containers - Running instances of Docker images — containers run the actual applications. A container includes an application and all of its dependencies. It shares the kernel with other containers, and runs as an isolated process in user space on the host OS. You created a container using
docker runwhich you did using the alpine image that you downloaded. A list of running containers can be seen using thedocker pscommand. - Docker daemon - The background service running on the host that manages building, running and distributing Docker containers.
- Docker client - The command line tool that allows the user to interact with the Docker daemon.
- Docker Hub - A registry of Docker images, where you can find trusted and enterprise ready containers, plugins, and Docker editions. You'll be using this later in this tutorial.
What You Learned
- docker pull: Download images from a registry (Docker Hub)
- docker run: Create and start a container from an image
- docker ps: List running containers (
-afor all, including stopped) - Interactive mode: Use
-itflags to get a shell inside a container - Key vocabulary: Images (blueprints) vs Containers (running instances)
2. Webapps with Docker🔗
Source: https://github.com/docker/labs
Great! So you have now looked at docker run, played with a Docker container and also got the hang of some terminology. Armed with all this knowledge, you are now ready to get to the real stuff — deploying web applications with Docker.
2.1 Run a static website in a container🔗
Note: Code for this section is in this repo in the website directory
Let's start by taking baby-steps. First, we'll use Docker to run a static website in a container. The website is based on an existing image. We'll pull a Docker image from Docker Hub, run the container, and see how easy it is to set up a web server.
The image that you are going to use is a single-page website that was already created for this demo and is available on Docker Hub as dockersamples/static-site. You can download and run the image directly in one go using docker run as follows.
docker run -d dockersamples/static-site
Files:
Note: The
-dflag enables detached mode, which detaches the running container from the terminal/shell and returns your prompt after the container starts.
So, what happens when you run this command?
Since the image doesn't exist on your Docker host, the Docker daemon first fetches it from the registry and then runs it as a container.
Now that the server is running, do you see the website? What port is it running on? And more importantly, how do you access the container directly from our host machine?
Actually, you probably won't be able to answer any of these questions yet! ☺ In this case, the client didn't tell the Docker Engine to publish any of the ports, so you need to re-run the docker run command to add this instruction.
Let's re-run the command with some new flags to publish ports and pass your name to the container to customize the message displayed. We'll use the -d option again to run the container in detached mode.
First, stop the container that you have just launched. In order to do this, we need the container ID.
Since we ran the container in detached mode, we don't have to launch another terminal to do this. Run docker ps to view the running containers.
$ docker ps
CONTAINER ID        IMAGE                  COMMAND                  CREATED             STATUS              PORTS               NAMES
a7a0e504ca3e        dockersamples/static-site   "/bin/sh -c 'cd /usr/"   28 seconds ago      Up 26 seconds       80/tcp, 443/tcp     stupefied_mahavira
Check out the CONTAINER ID column. You will need to use this CONTAINER ID value, a long sequence of characters, to identify the container you want to stop, and then to remove it. The example below provides the CONTAINER ID on our system; you should use the value that you see in your terminal.
$ docker stop a7a0e504ca3e
$ docker rm   a7a0e504ca3e
Note: A cool feature is that you do not need to specify the entire
CONTAINER ID. You can just specify a few starting characters and if it is unique among all the containers that you have launched, the Docker client will intelligently pick it up.
Now, let's launch a container in detached mode as shown below:
$ docker run --name static-site -e AUTHOR="Your Name" -d -p 8080:80 dockersamples/static-site
e61d12292d69556eabe2a44c16cbd54486b2527e2ce4f95438e504afb7b02810
In the above command:
-dwill create a container with the process detached from our terminal-p 8080:80maps port 8080 on your host to port 80 in the container (format:host:container)-eis how you pass environment variables to the container--nameallows you to specify a container nameAUTHORis the environment variable name andYour Nameis the value that you can pass
You can verify the port mapping by running the docker port command:
$ docker port static-site
80/tcp -> 0.0.0.0:8080
If you are on Codespace, the port 8080 should be automatically detected. You can also manually forward port 8080 to access the website.
Open http://localhost:8080 in your browser to see the website.
You can also run a second webserver at the same time on a different port:
$ docker run --name static-site-2 -e AUTHOR="Your Name" -d -p 8888:80 dockersamples/static-site

To deploy this on a real server you would just need to install Docker, and run the above docker command (as in this case you can see the AUTHOR is Docker which we passed as an environment variable).
Now that you've seen how to run a webserver inside a Docker container, how do you create your own Docker image? This is the question we'll explore in the next section.
But first, let's stop and remove the containers since you won't be using them anymore.
$ docker stop static-site
$ docker rm static-site
Let's use a shortcut to remove the second site:
$ docker rm -f static-site-2
Run docker ps to make sure the containers are gone.
$ docker ps
CONTAINER ID        IMAGE               COMMAND             CREATED             STATUS              PORTS               NAMES
2.2 Docker Images🔗
In this section, let's dive deeper into what Docker images are. You will build your own image, use that image to run an application locally.
Docker images are the basis of containers. In the previous example, you pulled the dockersamples/static-site image from the registry and asked the Docker client to run a container based on that image. To see the list of images that are available locally on your system, run the docker images command.
$ docker images
REPOSITORY                  TAG                 IMAGE ID            CREATED             SIZE
dockersamples/static-site   latest              92a386b6e686        2 hours ago         190.5 MB
nginx                       latest              af4b3d7d5401        3 hours ago         190.5 MB
python                      3.11                1c32174fd534        14 hours ago        1.01 GB
postgres                    16                  88d845ac7a88        14 hours ago        432 MB
redis                       7-alpine            4f5f397d4b7c        7 days ago          41 MB
alpine                      3.18                70c557e50ed6        8 days ago          7.8 MB
Above is a list of images that I've pulled from the registry and those I've created myself (we'll shortly see how). You will have a different list of images on your machine. The TAG refers to a particular snapshot of the image and the ID is the corresponding unique identifier for that image.
For simplicity, you can think of an image akin to a git repository - images can be committed with changes and have multiple versions. When you do not provide a specific version number, the client defaults to latest.
For example you could pull a specific version of ubuntu image as follows:
$ docker pull ubuntu:22.04
If you do not specify the version number of the image then, as mentioned, the Docker client will default to a version named latest.
So for example, the docker pull command given below will pull an image named ubuntu:latest:
$ docker pull ubuntu
To get a new Docker image you can either get it from a registry (such as Docker Hub) or create your own. There are hundreds of thousands of images available on Docker Hub. You can also search for images directly from the command line using docker search.
An important distinction with regard to images is between base images and child images.
-
Base images are images that have no parent images, usually images with an OS like ubuntu, alpine or debian.
-
Child images are images that build on base images and add additional functionality.
Another key concept is the idea of official images and user images. (Both of which can be base images or child images.)
-
Official images are Docker sanctioned images. Docker, Inc. sponsors a dedicated team that is responsible for reviewing and publishing all Official Repositories content. This team works in collaboration with upstream software maintainers, security experts, and the broader Docker community. These are not prefixed by an organization or user name. In the list of images above, the
python,node,alpineandnginximages are official (base) images. To find out more about them, check out the Official Images Documentation. -
User images are images created and shared by users like you. They build on base images and add additional functionality. Typically these are formatted as
user/image-name. Theuservalue in the image name is your Docker Hub user or organization name.
2.3 Create your first image🔗
Note: The code for this section is in this repository in the flask-app directory.
Now that you have a better understanding of images, it's time to create your own. Our goal here is to create an image that sandboxes a small Flask application.
The goal of this exercise is to create a Docker image which will run a Flask app.
We'll do this by first pulling together the components for a random cat picture generator built with Python Flask, then dockerizing it by writing a Dockerfile. Finally, we'll build the image, and then run it.
- Create a Python Flask app that displays random cat pix
- Write a Dockerfile
- Build the image
- Run your image
- Dockerfile commands summary
2.3.1 Create a Python Flask app that displays random cat pix🔗
For the purposes of this workshop, we've created a fun little Python Flask app that displays a random cat .gif every time it is loaded - because, you know, who doesn't like cats?
Start by creating a directory called flask-app where we'll create the following files:
Make sure to cd flask-app before you start creating the files, because you don't want to start adding a whole bunch of other random files to your image.
app.py🔗
Create the app.py with the following content:
from flask import Flask, render_template
import random

app = Flask(__name__)

# list of cat images
images = [
   "https://storage.googleapis.com/fchouteau-isae-cloud/gifs/gif1.gif",
   "https://storage.googleapis.com/fchouteau-isae-cloud/gifs/gif2.gif",
   "https://storage.googleapis.com/fchouteau-isae-cloud/gifs/gif3.gif",
   "https://storage.googleapis.com/fchouteau-isae-cloud/gifs/gif4.gif",
   "https://storage.googleapis.com/fchouteau-isae-cloud/gifs/gif5.gif",
   "https://storage.googleapis.com/fchouteau-isae-cloud/gifs/gif6.gif",
    ]

@app.route('/')
def index():
    url = random.choice(images)
    return render_template('index.html', url=url)

if __name__ == "__main__":
    app.run(host="0.0.0.0")
requirements.txt🔗
In order to install the Python modules required for our app, we need to create a file called requirements.txt and add the following line to that file:
flask
typer
templates/index.html🔗
Create a directory called templates and create an index.html file in that directory with the following content in it:
<html>
  <head>
    <style type="text/css">
      body {
        background: black;
        color: white;
      }
      div.container {
        max-width: 500px;
        margin: 100px auto;
        border: 20px solid white;
        padding: 10px;
        text-align: center;
      }
      h4 {
        text-transform: uppercase;
      }
    </style>
  </head>
  <body>
    <div class="container">
      <h4>Cat Gif of the day</h4>
      <img src="{{url}}" />
    </div>
  </body>
</html>
2.3.2 Write a Dockerfile🔗
We want to create a Docker image with this web app. As mentioned above, all user images are based on a base image. Since our application is written in Python, we will build our own Python image based on Alpine. We'll do that using a Dockerfile.
A Dockerfile is a text file that contains a list of commands that the Docker daemon calls while creating an image. The Dockerfile contains all the information that Docker needs to know to run the app — a base Docker image to run from, location of your project code, any dependencies it has, and what commands to run at start-up. It is a simple way to automate the image creation process. The best part is that the commands you write in a Dockerfile are almost identical to their equivalent Linux commands. This means you don't really have to learn new syntax to create your own Dockerfiles.
- Create a file called Dockerfile, and add content to it as described below.
We'll start by specifying our base image, using the FROM keyword:
FROM alpine:3.18
Note : If you use the latest version of alpine which is 3.20, follow this tutorial to handle an error you might be getting
- The next step usually is to write the commands of copying the files and installing the dependencies. But first we will install the Python pip package to the alpine linux distribution. This will not just install the pip package but any other dependencies too, which includes the python interpreter. Add the following RUN command next.
RUN apk add --update py-pip
- Let's add the files that make up the Flask Application.
Install all Python requirements for our app to run. This will be accomplished by adding the lines:
COPY requirements.txt /usr/src/app/
RUN pip install --no-cache-dir -r /usr/src/app/requirements.txt
Copy the files you have created earlier into our image by using COPY command.
COPY app.py /usr/src/app/
COPY templates/index.html /usr/src/app/templates/
- Specify the port number which needs to be exposed. Since our flask app is running on
5000that's what we'll expose.
EXPOSE 5000
- The last step is the command for running the application which is simply -
python ./app.py. Use the CMD command to do that:
CMD ["python", "/usr/src/app/app.py"]
The primary purpose of CMD is to tell the container which command it should run by default when it is started.
- Verify your Dockerfile.
Our Dockerfile is now ready. This is how it looks:
# our base image
FROM alpine:3.18

# Install python and pip
RUN apk add --update py-pip

# install Python modules needed by the Python app
COPY requirements.txt /usr/src/app/
RUN pip install --no-cache-dir -r /usr/src/app/requirements.txt

# copy files required for the app to run
COPY app.py /usr/src/app/
COPY templates/index.html /usr/src/app/templates/

# tell the port number the container should expose
EXPOSE 5000

# run the application
CMD ["python", "/usr/src/app/app.py"]
2.3.3 Build the image🔗
Now that you have your Dockerfile, you can build your image. The docker build command does the heavy-lifting of creating a docker image from a Dockerfile.
The docker build command is quite simple - it takes an optional tag name with the -t flag, and the location of the directory containing the Dockerfile - the . indicates the current directory:
docker build -t myfirstapp:1.0 .
$ docker build -t myfirstapp:1.0 .
[+] Building 45.2s (10/10) FINISHED
 => [internal] load build definition from Dockerfile                       0.0s
 => [internal] load .dockerignore                                          0.0s
 => [internal] load metadata for docker.io/library/alpine:3.18             1.2s
 => [1/5] FROM docker.io/library/alpine:3.18                               2.1s
 => [2/5] RUN apk add --update py-pip                                     15.3s
 => [3/5] COPY requirements.txt /usr/src/app/                              0.0s
 => [4/5] RUN pip install --no-cache-dir -r /usr/src/app/requirements.txt 20.1s
 => [5/5] COPY app.py /usr/src/app/                                        0.0s
 => [6/5] COPY templates/index.html /usr/src/app/templates/                0.0s
 => exporting to image                                                     1.2s
 => => writing image sha256:2f7357a0805d...                                0.0s
 => => naming to docker.io/library/myfirstapp:1.0                          0.0s
If you don't have the alpine:3.18 image, the client will first pull the image and then create your image. Therefore, your output on running the command will look different from mine. If everything went well, your image should be ready! Run docker images and see if your image (myfirstapp:1.0) shows.
2.3.4 Run your image🔗
The next step in this section is to run the image and see if it actually works.
$ docker run -p 8888:5000 --name myfirstapp myfirstapp:1.0
 * Running on http://0.0.0.0:5000/ (Press CTRL+C to quit)
Head over to http://localhost:8888 and your app should be live. If you're using Codespace, make sure port 8888 is forwarded.
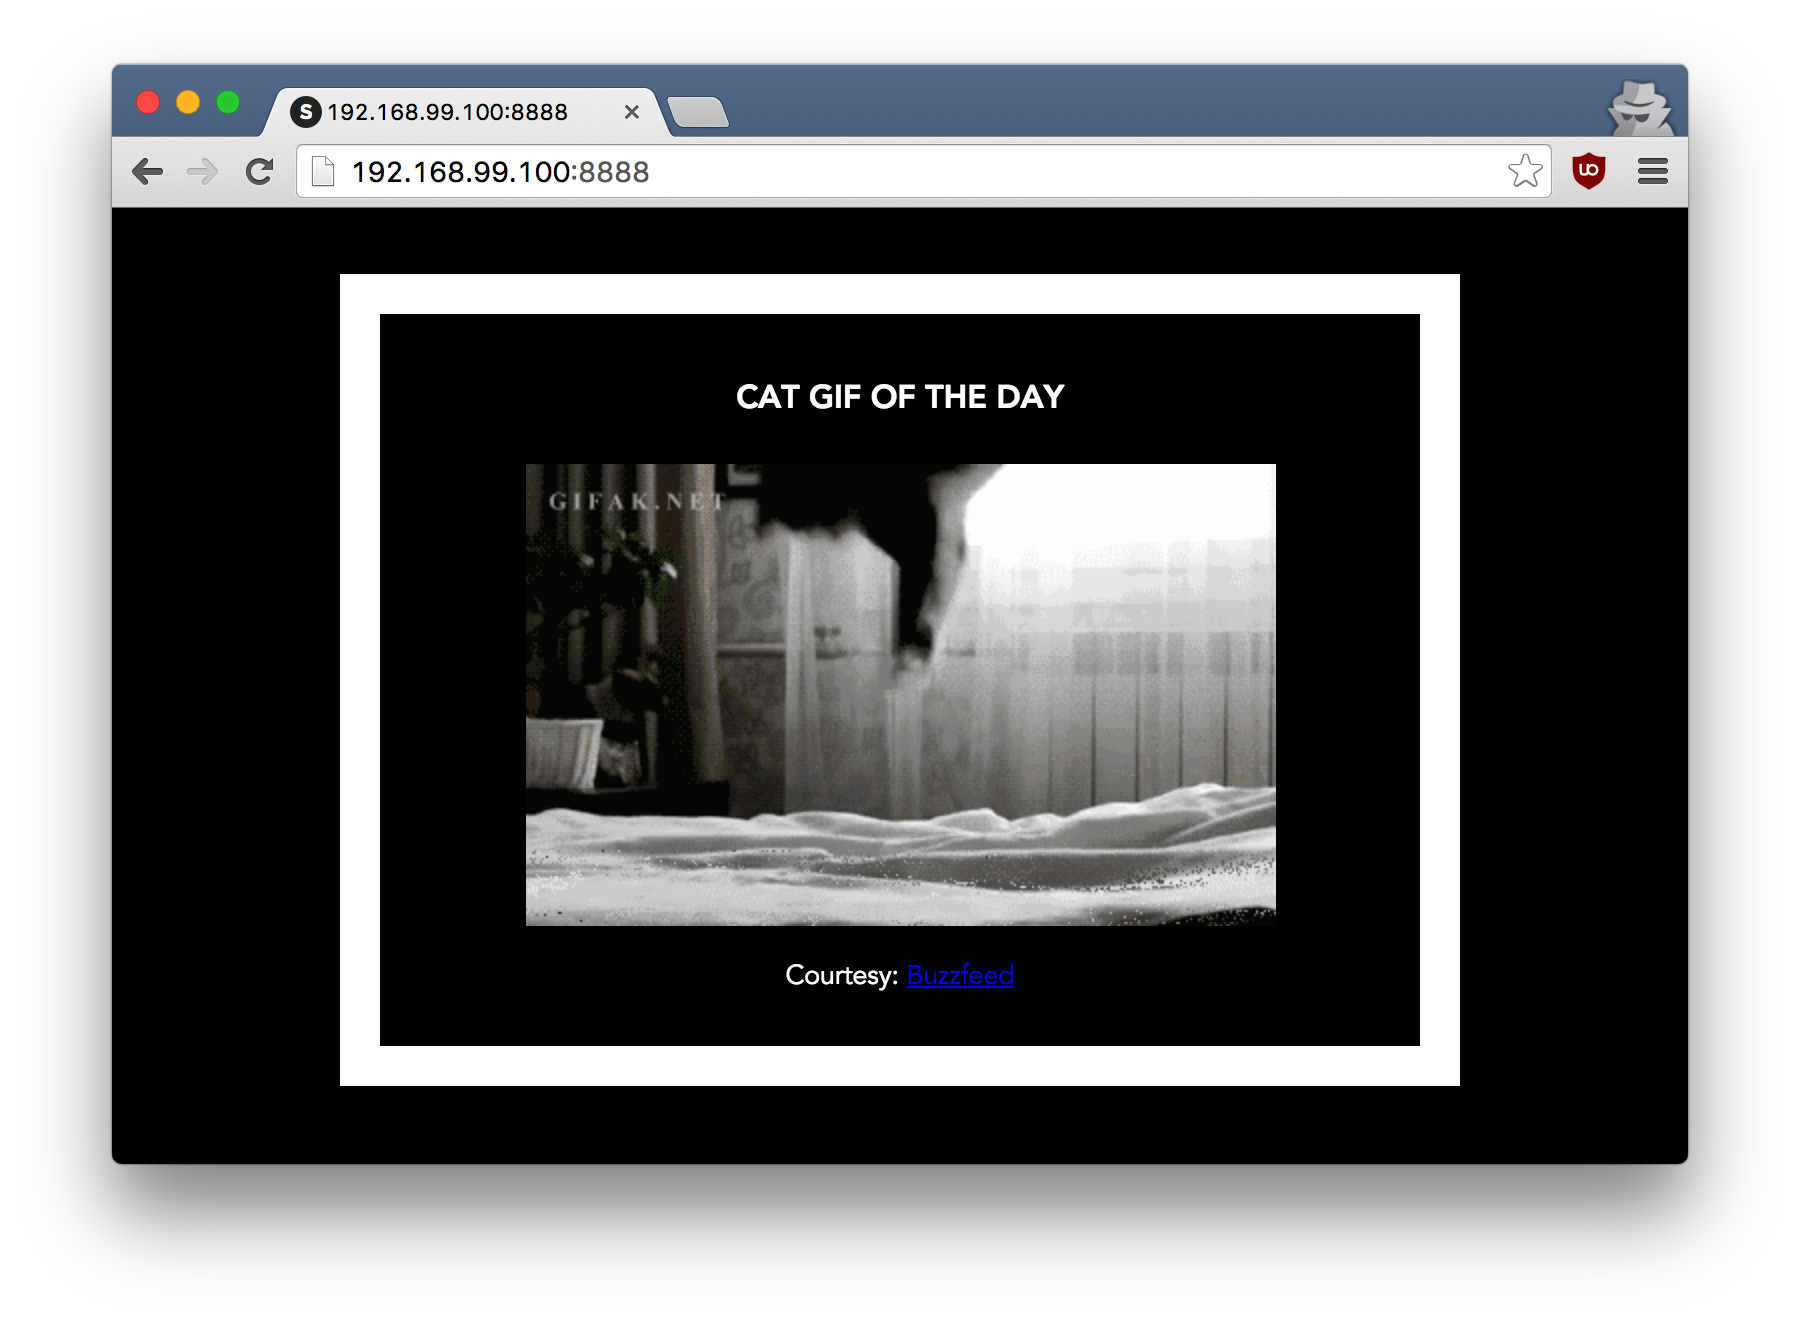
Hit the Refresh button in the web browser to see a few more cat images.
2.3.5 Dockerfile commands summary🔗
Here's a quick summary of the few basic commands we used in our Dockerfile.
-
FROMstarts the Dockerfile. It is a requirement that the Dockerfile must start with theFROMcommand. Images are created in layers, which means you can use another image as the base image for your own. TheFROMcommand defines your base layer. As arguments, it takes the name of the image. Optionally, you can add the Docker Hub username and image version, in the formatusername/imagename:version. -
RUNis used to build up the Image you're creating. For eachRUNcommand, Docker will run the command then create a new layer of the image. This way you can roll back your image to previous states easily. The syntax for aRUNinstruction is to place the full text of the shell command after theRUN(e.g.,RUN mkdir /user/local/foo). This will automatically run in a/bin/shshell. You can define a different shell like this:RUN /bin/bash -c 'mkdir /user/local/foo' -
COPYcopies local files into the container. -
CMDdefines the commands that will run on the Image at start-up. Unlike aRUN, this does not create a new layer for the Image, but simply runs the command. There can only be oneCMDper a Dockerfile/Image. If you need to run multiple commands, the best way to do that is to have theCMDrun a script.CMDrequires that you tell it where to run the command, unlikeRUN. So exampleCMDcommands would be:
  CMD ["python", "./app.py"]

  CMD ["/bin/bash", "echo", "Hello World"]
EXPOSEcreates a hint for users of an image which ports provide services. It is included in the information which can be retrieved via$ docker inspect <container-id>.
Note: The
EXPOSEcommand does not actually make any ports accessible to the host! Instead, this requires publishing ports by means of the-pflag when using$ docker run.
WORKDIRsets the working directory for anyRUN,CMD,ENTRYPOINT,COPYandADDinstructions that follow it. It's good practice to set this explicitly rather than relying on the default (/).
Note: To push your image to a registry, use the
docker pushcommand (not a Dockerfile instruction). Example:docker push username/imagename:tagNote: If you want to learn more about Dockerfiles, check out Best practices for writing Dockerfiles.
2.3.6 Build context🔗
When you run docker build, Docker sends all files in the current directory to the Docker daemon. This is called the build context. Keep your build directory clean to speed up builds.
Tip
For details on excluding files with .dockerignore, see the Advanced section at the end.
What You Learned
- Running web apps: Use
-dfor detached mode,-p host:containerfor port mapping - Building images: Write a
Dockerfile, thendocker build -t name:tag . - Dockerfile instructions:
FROM,RUN,COPY,EXPOSE,CMDand their purposes - Build context & .dockerignore: Control what gets sent to the Docker daemon
3. Running CLI Apps with Docker: Passing Data at Runtime🔗
In Section 2, you built a static website where all content was baked into the image. Now we'll package CLI applications that process data passed at runtime - the pattern used for ML training.
| Aspect | Static Web (Section 2) | CLI App (Section 3) |
|---|---|---|
| Content | Baked into image at build time | Passed at runtime via volumes |
| Rebuild needed? | Yes, for any content change | No - same image, different data |
| Use case | Web servers, APIs | Training scripts, data processing |
3.1 Volume Mounting: Sharing Files with Containers🔗
The -v flag connects a folder on your host to a path inside the container, which allows to share files at runtime.
docker run -v /path/on/host:/path/in/container my-image
For example with ./ in host and /app/ in container,
Host Machine              Container
┌──────────────┐         ┌──────────────┐
│ ./configs/   │ ◄─────► │ /app/configs │
│ ./outputs/   │ ◄─────► │ /app/outputs │
└──────────────┘         └──────────────┘
- Files are shared bidirectionally (changes appear on both sides)
- Container paths must be absolute (
/app/configs, notconfigs) - No image rebuild needed - just run with different volumes
Now Let's Build This
In the following exercises, you'll create a training CLI, package it in Docker, and run it with different config files without rebuilding the image.
3.2 A local CLI application🔗
- In the
docker/app.py, I provided you with the following code :
import time
from pathlib import Path
from typing import Annotated, Optional

import typer

app = typer.Typer()


@app.command()
def say_hello(name: str):
    typer.echo(f"Hello {name}")


@app.command()
def run_training(
    config: Annotated[
        Path,
        typer.Option(
            exists=True,
            file_okay=True,
            dir_okay=False,
            writable=False,
            readable=True,
            resolve_path=True,
        ),
    ],
    output_dir: Annotated[
        Path,
        typer.Option(
            dir_okay=True,
            writable=True,
            readable=True,
            resolve_path=True,
            file_okay=False,
        ),
    ],
):
    text = config.read_text()
    print(f"Config file contents: {text}")

    print(f"Running training in {output_dir}...")

    time.sleep(10)

    output_dir.mkdir(exist_ok=True,parents=True)

    with open(output_dir / "results.txt", "w") as f:
        f.write("Training successful !")


if __name__ == "__main__":
    app()
- You can the application locally using
pip install typerthenpython app.py say-hello {my name}orpython app.py run-training --config {my config} --output-dir {somewhere}
3.3 Packaging it in a Dockerfile🔗
We will now package it in a docker file
- A provided a
Dockerfilein thedocker/folder. Compared to the previous one, here are the key differences: - Replaced
CMD ["python", "/usr/src/app/app.py"] - With
ENTRYPOINT ["python", "/usr/src/app/app.py"]
CMD vs ENTRYPOINT
- CMD: Arguments in
docker run myimage arg1replace the entire CMD - ENTRYPOINT: Arguments in
docker run myimage arg1are appended to ENTRYPOINT
For CLI apps, use ENTRYPOINT so users pass arguments naturally:
docker run myimage say-hello Alice # Runs: python app.py say-hello Alice
See also: CMD vs ENTRYPOINT deep dive
- Build the docker image for that application using what you learned.
3.4 Running the CLI App🔗
- Now to run the CLI you just have to pass the arguments when running the docker
docker run --rm {your image} {your args}. Try it withdocker run --rm {your image} say-hello {your name}
Now you know how to pass arguments to CLI applications in docker containers.
3.5 Mounting volumes🔗
Warning
once you have built your container and it works, don't rebuild it again ! We will test the volume mounting options now
- In order to pass a config file, or data to your docker, you need to make it available to your docker. To do that, we have to mount volumes
Create a dummy config file (config.txt) in a folder (e.g., configs/) and an empty outputs/ folder. Then mount them when you run the container:
docker run --rm \
  -v $(pwd)/configs:/app/configs \
  -v $(pwd)/outputs:/app/outputs \
  {your image} \
  run-training --config /app/configs/config.txt --output-dir /app/outputs/
Container Paths vs Host Paths
The paths after run-training are container paths (where Docker sees the files), not your local paths:
$(pwd)/configs→ your local folder (host)/app/configs→ where Docker mounts it (container)
Your CLI receives /app/configs/config.txt because that's where the file exists inside the container.
You've Mastered This When:
- You run training with different config files without rebuilding the image
- Output files appear in your local
outputs/folder after the container exits - You understand why the CLI uses
/app/configs(container path) not./configs(host path)
3.6 Troubleshooting Volume Mounts🔗
| Problem | Likely Cause | Solution |
|---|---|---|
| "File not found" in container | Wrong mount path | Verify with docker run --rm -v $(pwd)/configs:/app/configs myimage ls /app/configs |
| Changes don't appear on host | Volume not mounted | Check -v syntax is host:container, not reversed |
| Permission denied | Host dir permissions | Run chmod -R 755 ./outputs or check file ownership |
What You Learned
- ENTRYPOINT vs CMD:
ENTRYPOINTfor CLI apps that accept arguments - Volume mounting:
-v host_path:container_pathconnects local folders to containers - Path distinction: Host paths for
-v, container paths for your CLI - ML training pattern: Mount config/data in, mount outputs out, keep image unchanged
4. Containers Registry🔗
Remember Container Registries? Here are some explainers
The main container registry is dockerhub, https://hub.docker.com/
All docker engines that have access to the internet have access to this main hub, and this is where we pulled our base images from before
Example, the Python Image
Google Cloud has an Artifacts Registry per project, which ensures the docker images you build are accessible for the people who have access to your project only.
We will follow this tutorial to push our images to artifact registry
-
First, create a Docker Artifact registry using this tutorial, example
fch-sdd2425-artifacts-registry(that's mine, name it with your name). Set the repository inmulti-region/europe -
Pushing our images requires authenticating,
gcloud auth configure-docker europe-docker.pkg.dev -
Pushing our images requires tagging them in a specific way :
europe-docker.pkg.dev/${PROJECT_ID}/${REPO_ID}/${IMAGE}:${TAG} -
Use the docker cli to tag your previous
myfirstappimage to the right namespace
docker tag myfirstapp:1.0 europe-docker.pkg.dev/${PROJECT_ID}/${REPO_ID}/myfirstapp:1.0
- Upload it on container registry
docker push europe-docker.pkg.dev/${PROJECT_ID}/${REPO_ID}/[IMAGE]:[TAG]
Hint
to get your project id: PROJECT_ID=$(gcloud config get-value project 2> /dev/null)
to get your artifact repository id look at this page, you can get your project id this way as well
- Go to your artifact registry https://console.cloud.google.com/artifacts, you should see your docker image :)
What You Learned
- Container registries: Central storage for Docker images (like GitHub for code)
- Docker Hub vs private registries: Public images vs organization-private images
- GCP Artifact Registry: Google's managed container registry service
- Tag and push workflow:
docker tagto rename,docker pushto upload - Image naming convention:
registry/project/image:tagformat
What You've Learned🔗
Core Docker Skills
You now know how to:
- Pull and run containers from Docker Hub
- Build custom images with Dockerfiles
- Mount volumes to pass data at runtime
- Push images to a container registry
What's Next🔗
In Day 2, you'll combine Docker with GCP to deploy containerized ML models to the cloud.
The following sections are Advanced - useful reference material that you can explore after completing the core content.
Advanced - Pre-built Data Science Environments🔗
Docker images like Jupyter Docker Stacks provide fully configured data science environments. These images combine:
- Volume mounting: Connect your local notebooks to the container
- Port forwarding: Access Jupyter in your browser
Example usage:
docker run --rm -p 8888:8888 -v $(pwd):/home/jovyan/work jupyter/scipy-notebook
This pattern—pulling a pre-configured image and mounting your data—is useful for:
- Standardizing team development environments
- Quickly onboarding new team members
- Testing dependency upgrades without affecting your system
Note
These images can be large (several GB). Try this at home rather than during class to avoid network congestion.
Advanced - Docker Compose Preview🔗
Docker Compose manages multi-container applications with a single YAML file. Instead of running multiple docker run commands, you define your entire stack in docker-compose.yml:
services:
  web:
    image: myapp:1.0
    ports:
      - "8080:5000"
  redis:
    image: redis:alpine
Then start everything with:
docker compose up
You'll use Docker Compose on Day 2 when deploying a multi-container ML application (API backend + web frontend). For now, just know it exists.
Further reading: Docker Compose Getting Started
Advanced - Cloud Build🔗
Google Cloud Build builds Docker images in the cloud, without needing Docker installed locally. This is useful for CI/CD pipelines.
Instead of:
docker build -t myimage .
docker push europe-docker.pkg.dev/...
You run:
gcloud builds submit --tag europe-docker.pkg.dev/$PROJECT_ID/$REPO/myimage .
Cloud Build pulls your code, builds the image on Google's infrastructure, and pushes to Artifact Registry automatically. You'll see this in action if you continue with GCP-based ML deployments.
Advanced - Going Further🔗
Advanced - Docker Build Context and .dockerignore🔗
When you run docker build, Docker sends all files in the current directory (the build context) to the Docker daemon. This can slow down builds and bloat your image if unnecessary files are included.
The build context🔗
The build context is everything in the directory you specify when running docker build. For example:
docker build -t myapp:1.0 .
The . means "use the current directory as the build context". Docker will send all files in this directory to the daemon, which can be slow if you have large files (datasets, model weights, etc.).
Using .dockerignore🔗
Create a .dockerignore file to exclude files from the build context. This works like .gitignore:
# .dockerignore example
.git
__pycache__
*.pyc
.env
data/
models/
*.tar.gz
node_modules/
.vscode/
Tip
Always create a .dockerignore file in your project. It speeds up builds and prevents accidentally including sensitive files (like .env with secrets) in your image.
Troubleshooting🔗
Debugging Containers🔗
When things go wrong, these commands will help you troubleshoot:
View container logs🔗
# See logs from a running or stopped container
docker logs <container-name-or-id>

# Follow logs in real-time (like tail -f)
docker logs -f <container-name-or-id>

# Show only the last 100 lines
docker logs --tail 100 <container-name-or-id>
Get a shell inside a running container🔗
# Open an interactive shell in a running container
docker exec -it <container-name-or-id> /bin/sh

# Or use bash if available
docker exec -it <container-name-or-id> /bin/bash
Inspect container details🔗
# See detailed container configuration (ports, volumes, env vars, etc.)
docker inspect <container-name-or-id>

# See resource usage (CPU, memory)
docker stats <container-name-or-id>
Debug a failed build🔗
If your build fails, you can run a container from the last successful layer:
# Find the last successful layer ID in the build output, then:
docker run -it <layer-id> /bin/sh
Note
These debugging skills are essential when deploying ML models. Container logs are often the first place to check when a model serving endpoint fails.